The Arduino Projects Post
Latest update: November 2017 soldering and serialising and buffering and capacitating
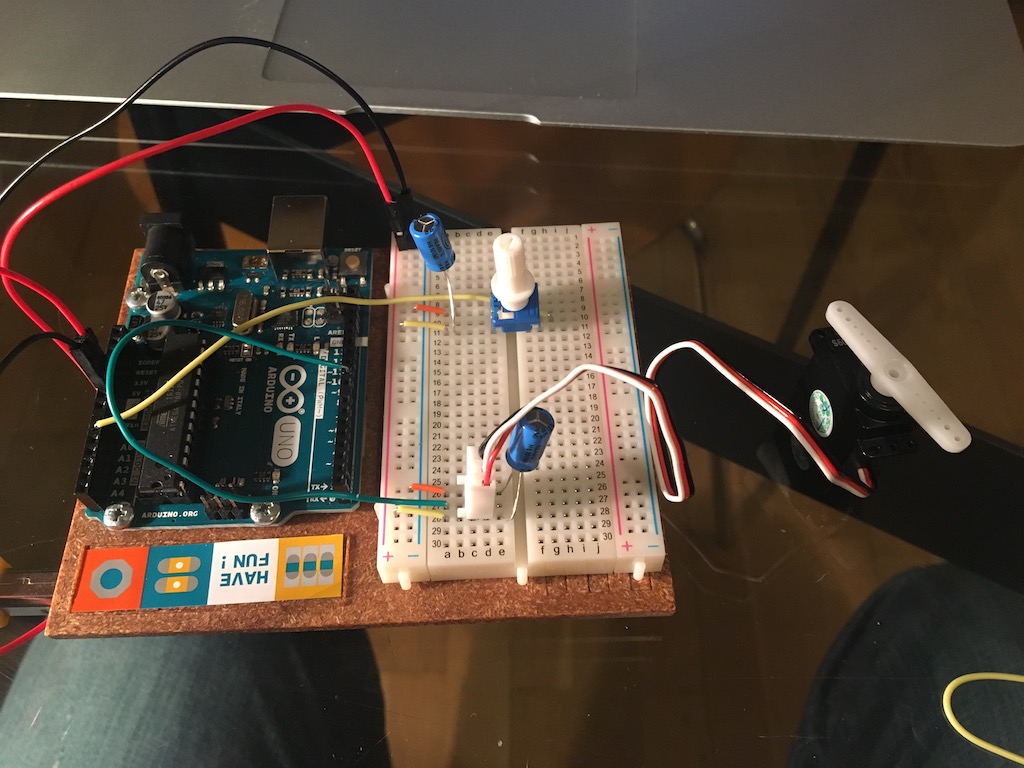
Project 14 - Sending serial input to a Processing sketch
How to create input controllers that other apps can read. The pot meter sends serial data to the comp, Processing receives the data in its buffer, and assigns color values to the background of an image based on the value.
Project 13 - Capacitive Sensor
Using my body to close the circuit and tell the LED to turn on. So basically Tesla.
My First Soldering Project, aka “Grandpa Would Be Proud”
For this assignment I was meant to recreate one of the earlier projects — but soldering the circuits on a tiny stripboard. I chose the heat sensor project, mostly because it used cheap components that I wouldn’t mind frying in case soldering is my nemesis (spoiler: it’s not and it’s so. much. fun).
Step one: Schematics
I wanted to have a design that looks as clean as possible, even if it meant a more complicated circuit. Well, I definitely made more work for myself than I needed to. But hey. I’m here to learn soldering, and it’s all about practice.


Fritzing to the rescue - as buggy and confusing as Fritzing is, an app that helps you visually try out combinations was a boon.
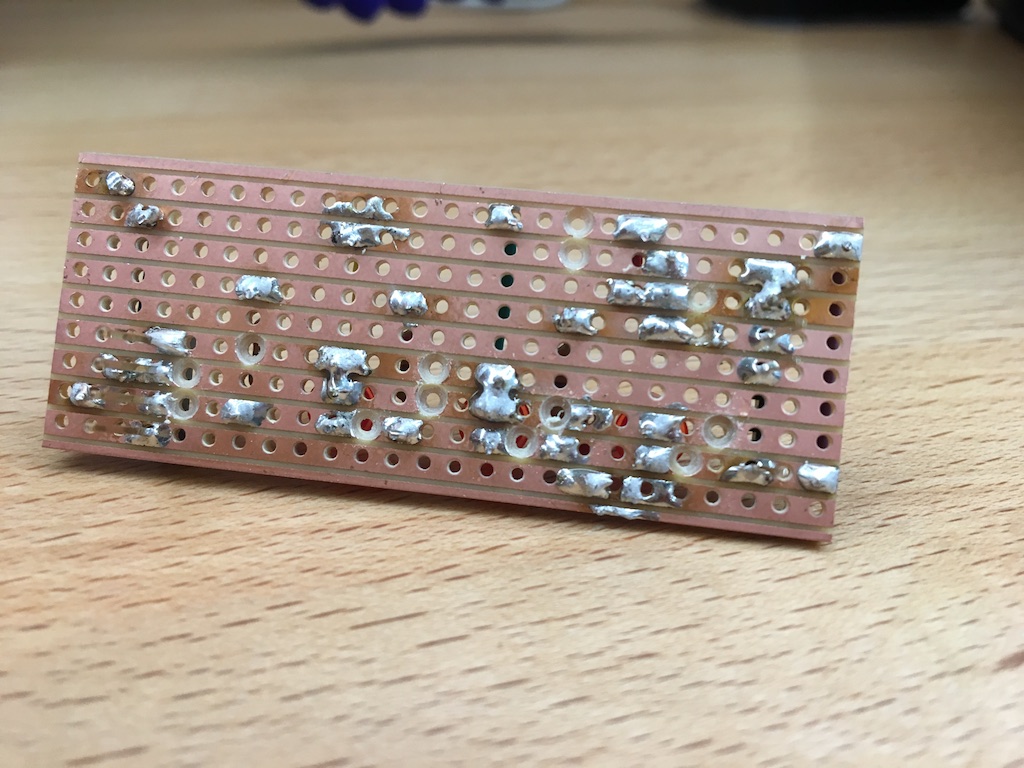
Step two: Soldering
SO. MUCH. FUN. I spent about two hours on this, between getting the hang of soldering, finding the best position, hacking my schematics on the fly (cause when theory hits the real world, something inevitably breaks).
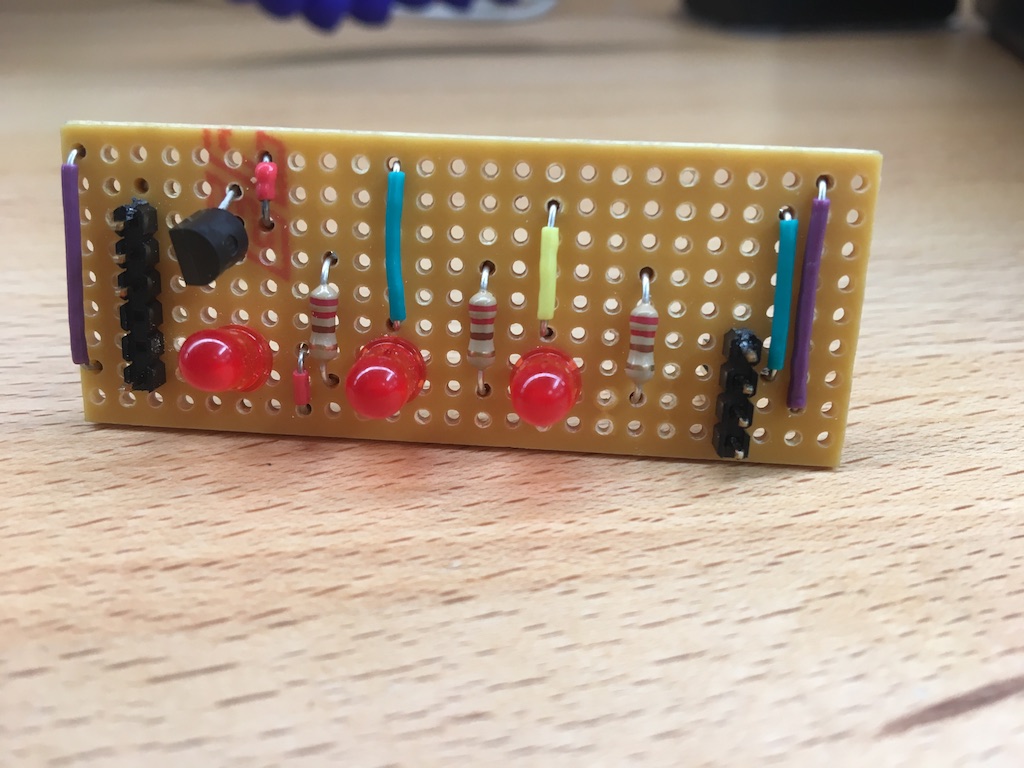
Step three: Placing on the board
I designed the strip board to fit directly on the Arduino, cause who wants loose wires all over the place.
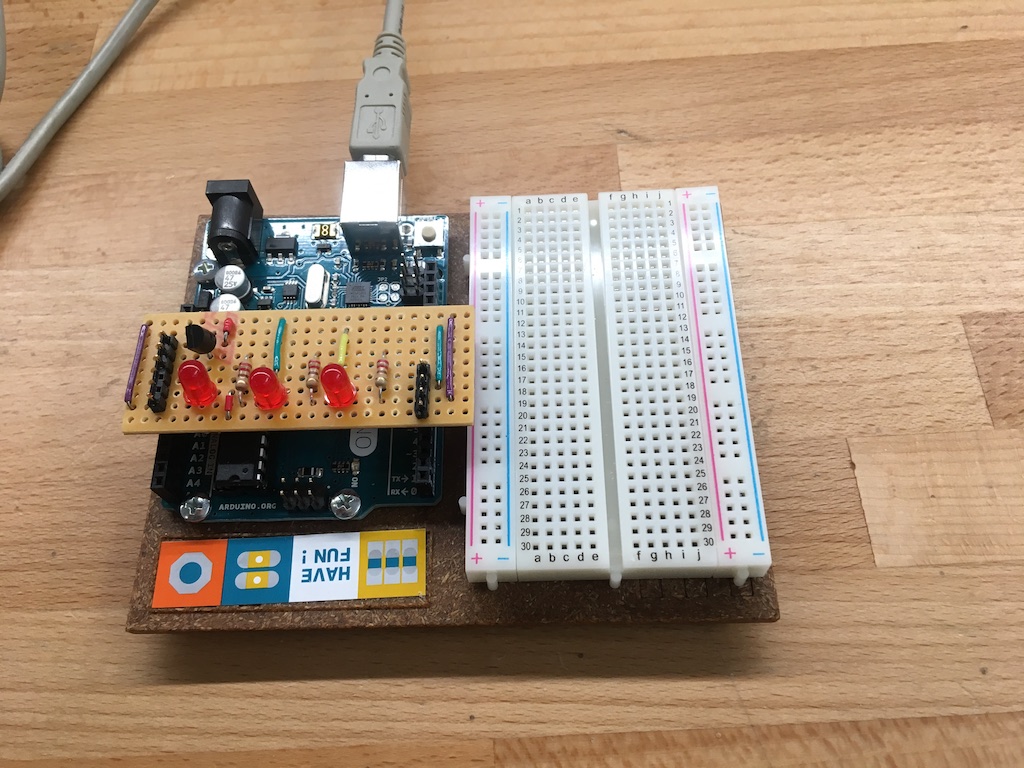
Step four: Testing
It worked on first try which was obviously beginners’ luck. the trickiest part was - again - testing the board out with a heat source. Only this time I had the opposite problem: a heat source was readily available (a glorious heat gun), but was much more powerful than I thought. I spent about five minutes waiting for the board to cool off after I heated it to 60C in two seconds.
Project 12 - The Knock Lock Box
A piezo listens for knocks — if it hears three properly forceful knocks, it will activate the servo and you will enter the mines of Moria.
Project 11 - The Magic Eight ball
Combining an LCD screen, a tilt switch, and a list of randomly summoned answers, we get the answer to any question.
Project 10 - Zoetrope
And when I say “zoetrope” I mean “a motor with regulating speed, an on-off switch and a button to reverse spin”. Probably the trickiest part of this build was finding a way to push buttons while also holding the motor and recording.
Project 9 - Electric Motors
Code-wise this was a basic circuit, but it was important to understand how to deal with a) more powerful sources of energy and b) back-voltage, i.e. the fact that once you start pushing an electric motor with curent, it keeps spinning and produces its own current that risks entering your circuit from the wrong side.
Project 8 - Hourglass
We were tasked with counting down our meager existence (or pasta cooking time) by turning our Arduinos into hourglasses. LEDs light up on regular intervals and you can flip the Arduino to reset them.
Project 7 - Keyboard
Piezos vibrate on frequencies, and each note has its own frequency (the most famous is “A” at 440hz). So if you send differently modulated current to a piezo, it will vibrate on a certain frequency. Result: PUBLIC DOMAIN MUSIC.
Project 6 - Theremin
The most exciting thing about this project is that the sound coming from the piezo is modulated by a light sensor, so basically you’re manipulating light in order to manipulate sound and that’s just cool. The least exciting thing was doing this project in a closed room with twenty other people making their Arduinos squeal in a gloriously atonal chaos.
Project 5 - Servo Motor
So this is where my Mac and my Arduino decided they never met before, and will not talk to strangers. I spent the better part of my evening troubleshooting the complete lack of meaningful port options on the Arduino app — besides the ever so useful Bluetooth Input — but I came up short. But the code compiles, and the capacitors didn’t explode, so we should be all set. For now, here’s a picture of the constructed board UPDATE the USB cable was faulty. People, if you get the Arduino kits, there’s a non-zero risk the provided USB cable will die on you for no reason. Also, before spending hours troubleshooting software, I learned it’s smart to check all the HW components first. Even if they are literally five days old and have been working flawlessly until yesterday.
Project 4 - RGB Sensor
Analogue input again, and playing with the big RGB LED from the kit. The red/green/blue gels are pretty flimsy, while the gel holders are massive, so together they make an odd couple. But not in a family-comedy sort of way, more like “how did anyone think this will work” kind of way. I resorted to veeeeerrry carefully balancing the gels on top of the light sensors. It worked.
Project 3 - Heat Sensor
First time playing with analogue sensors - it was fun to figure out how to actually activate a sensor with no easy heat source around me. Lighters? Dumb idea. Good thing my lamp doesn’t have an LED bulb…
Project 2 - Spaceship
This project was about programming the micro-controller to react to physical (digital) input, i.e. my fingers pushing a button.
Project 1 - Hurray, it’s a Circuit
My first pushing of buttons, lighting of LEDs, and closing of circuits, on an Arduino. No coding, just pushing current and learning how not to fry anything.